On the rare occasion we even think about insulation in our home’s attic, it’s usually sweltering hot or blistering cold. Why else would we worry about it? It’s during these times we realize we might be losing money through excessive heating and cooling costs! Let’s dig into insulation but leave any itchy parts for later!
Unfinished attic spaces are a transition zone between the extremes of outdoor temperatures and the heated or cooled temperatures of your living space. So it helps to know that you’re not trying to heat/cool your attic unless it’s actual living space.
Ventilation
Ideally, there should be good airflow in the attic. Airflow keeps your roof cooler in the summer which helps asphalt shingles last longer. In the winter, good airflow helps vent off any condensation caused by exhaust fans and/or warm air inside your house meeting up with the cold roof.
If you remember that “hot air rises” you can imagine how this airflow is best achieved. Vents located in the bottom of your soffits allow cooler air to enter while ridge or roof vents allow warmer air to escape near the peak of the roof. Houses may also have vents built into the gables but these rely on outdoor air movement to provide ventilation.
Types of Insulation
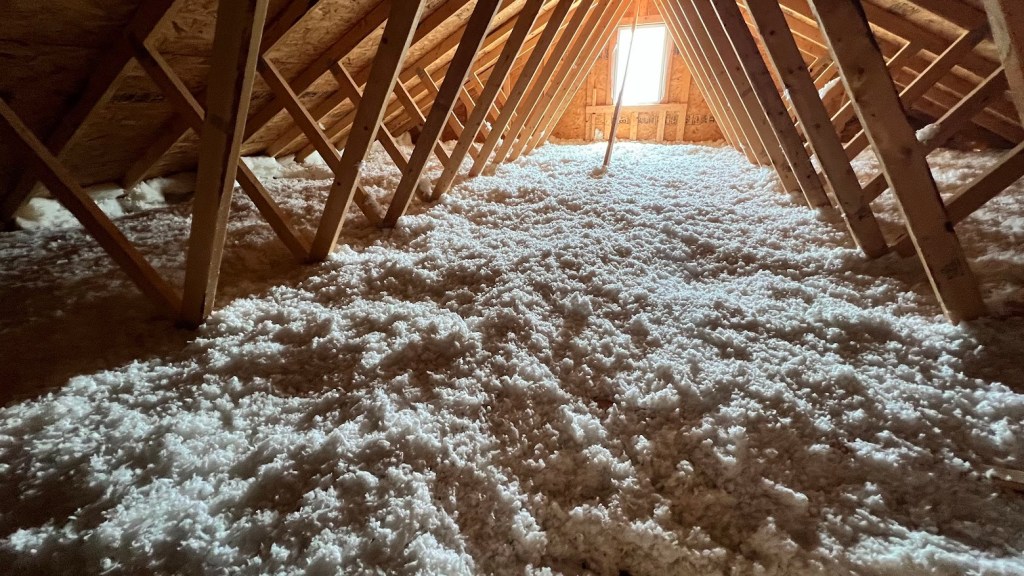
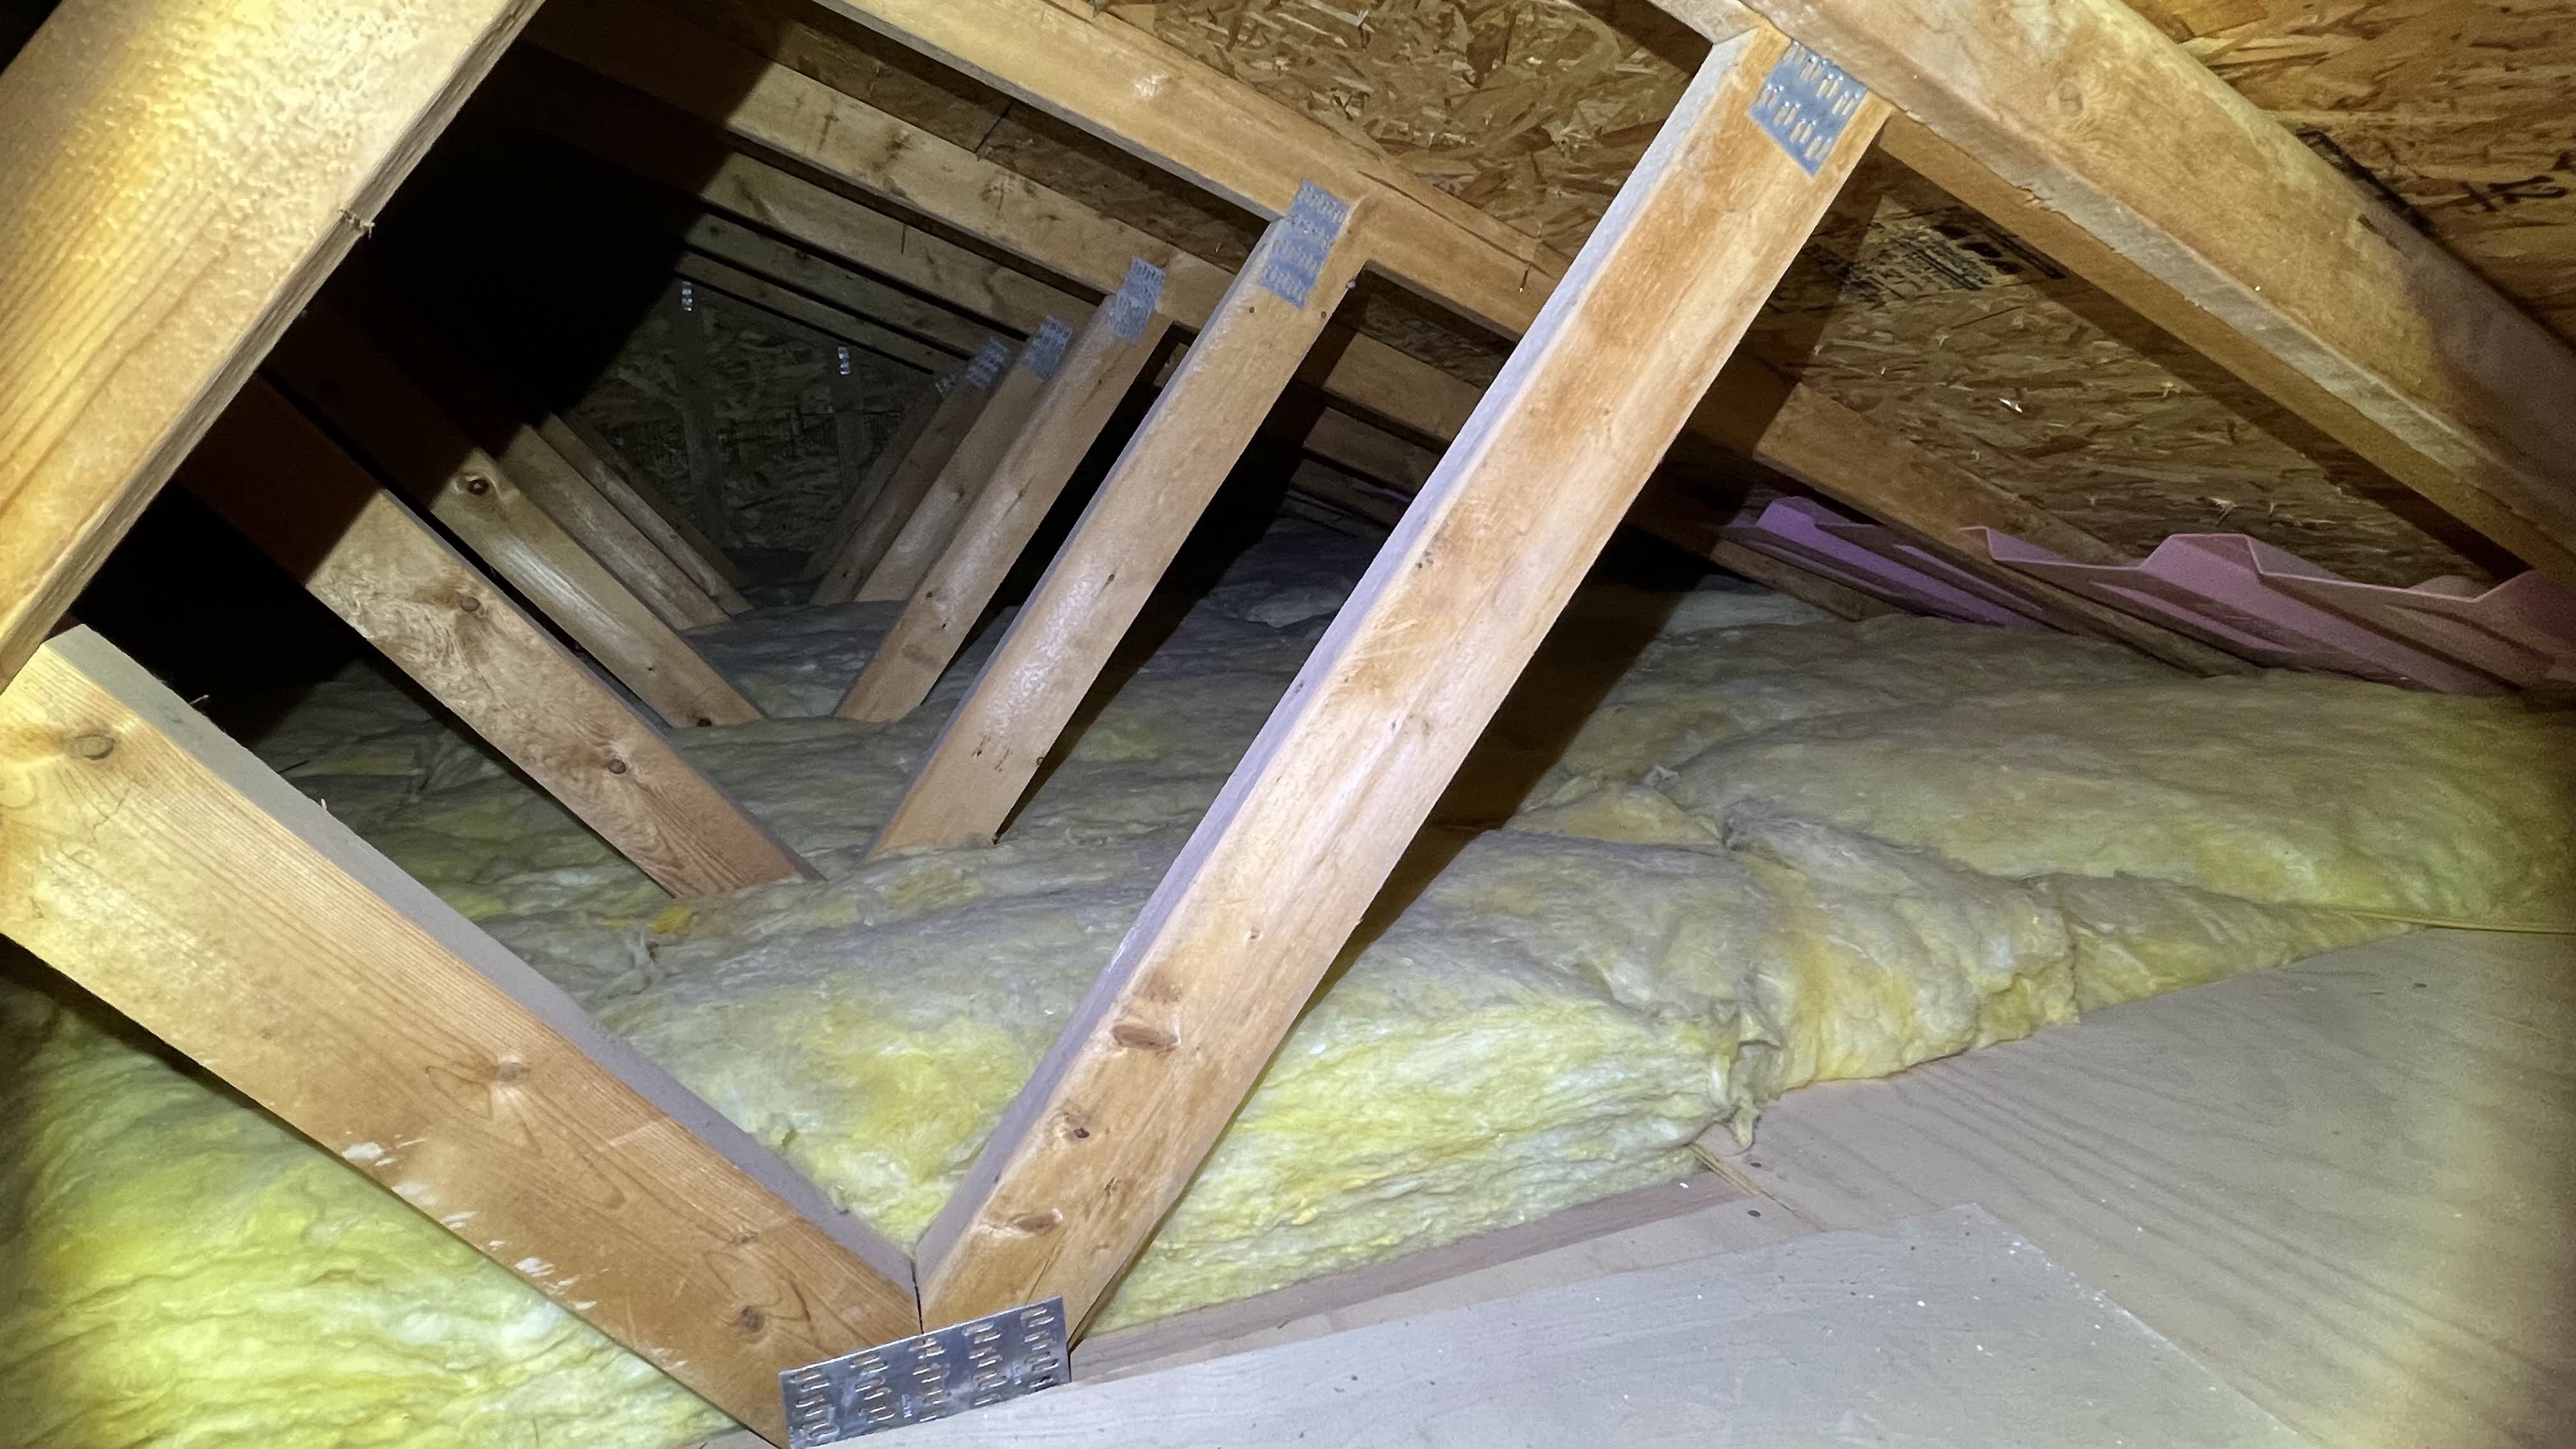
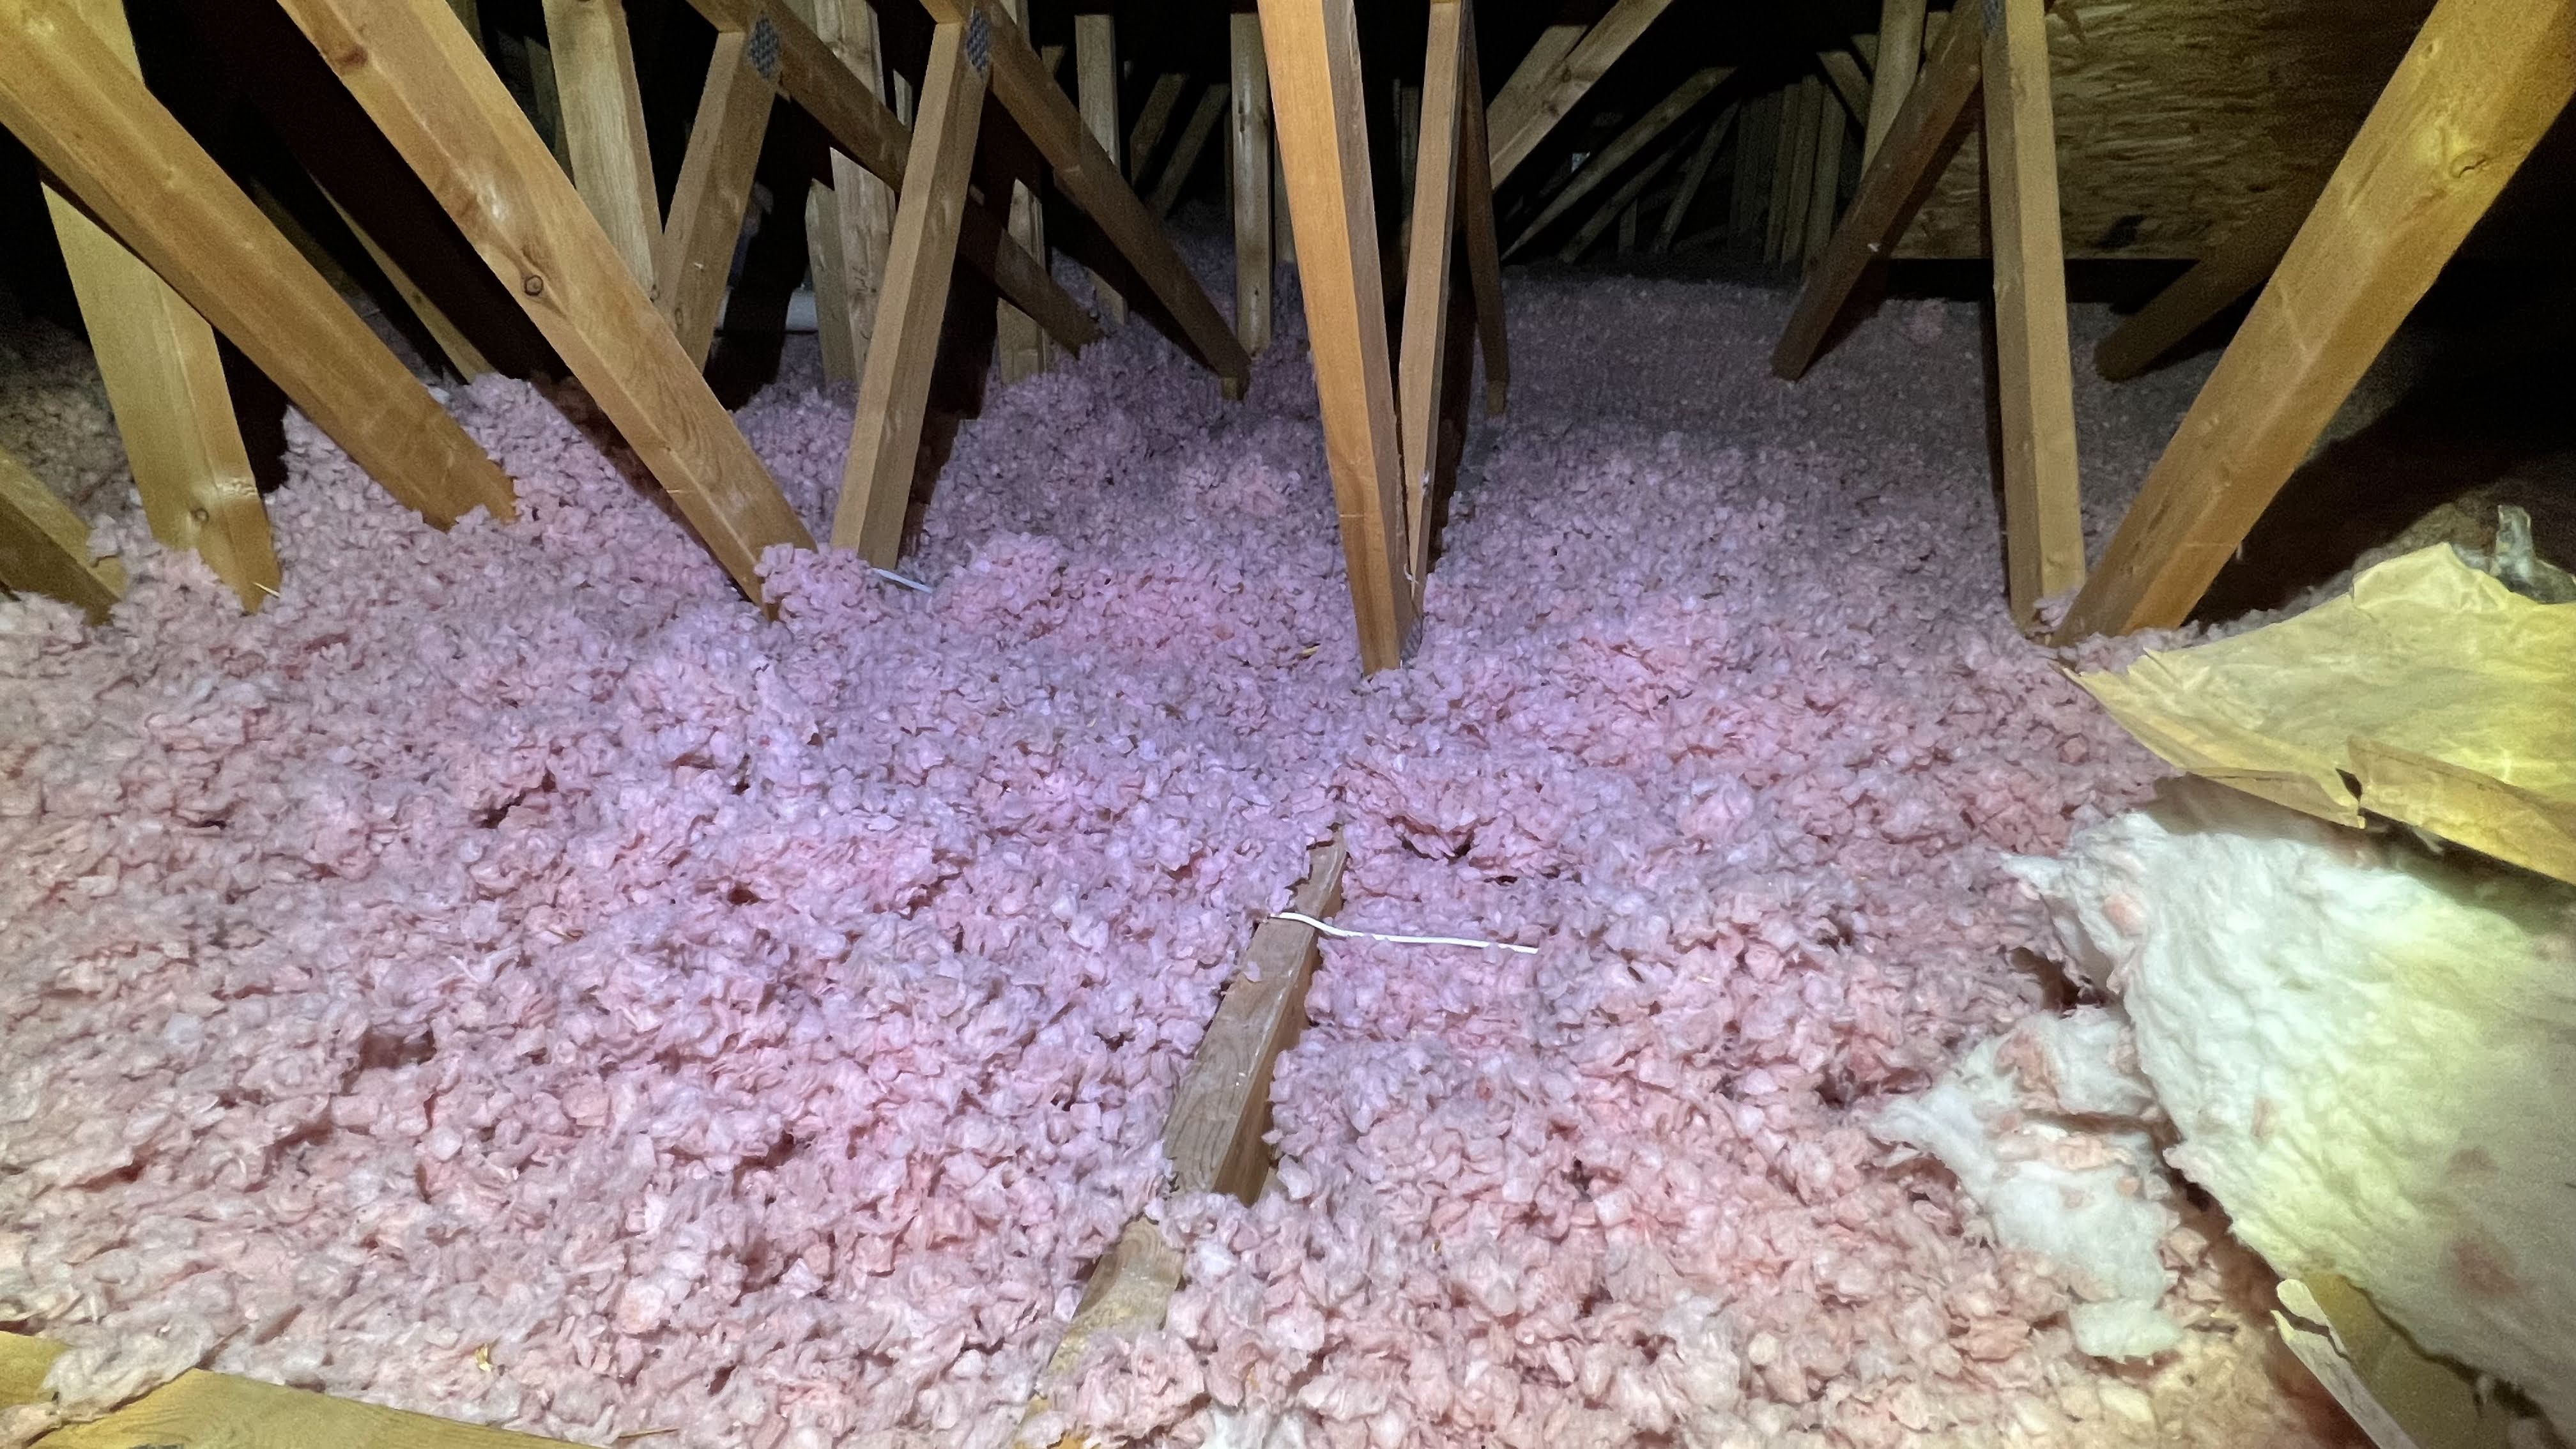
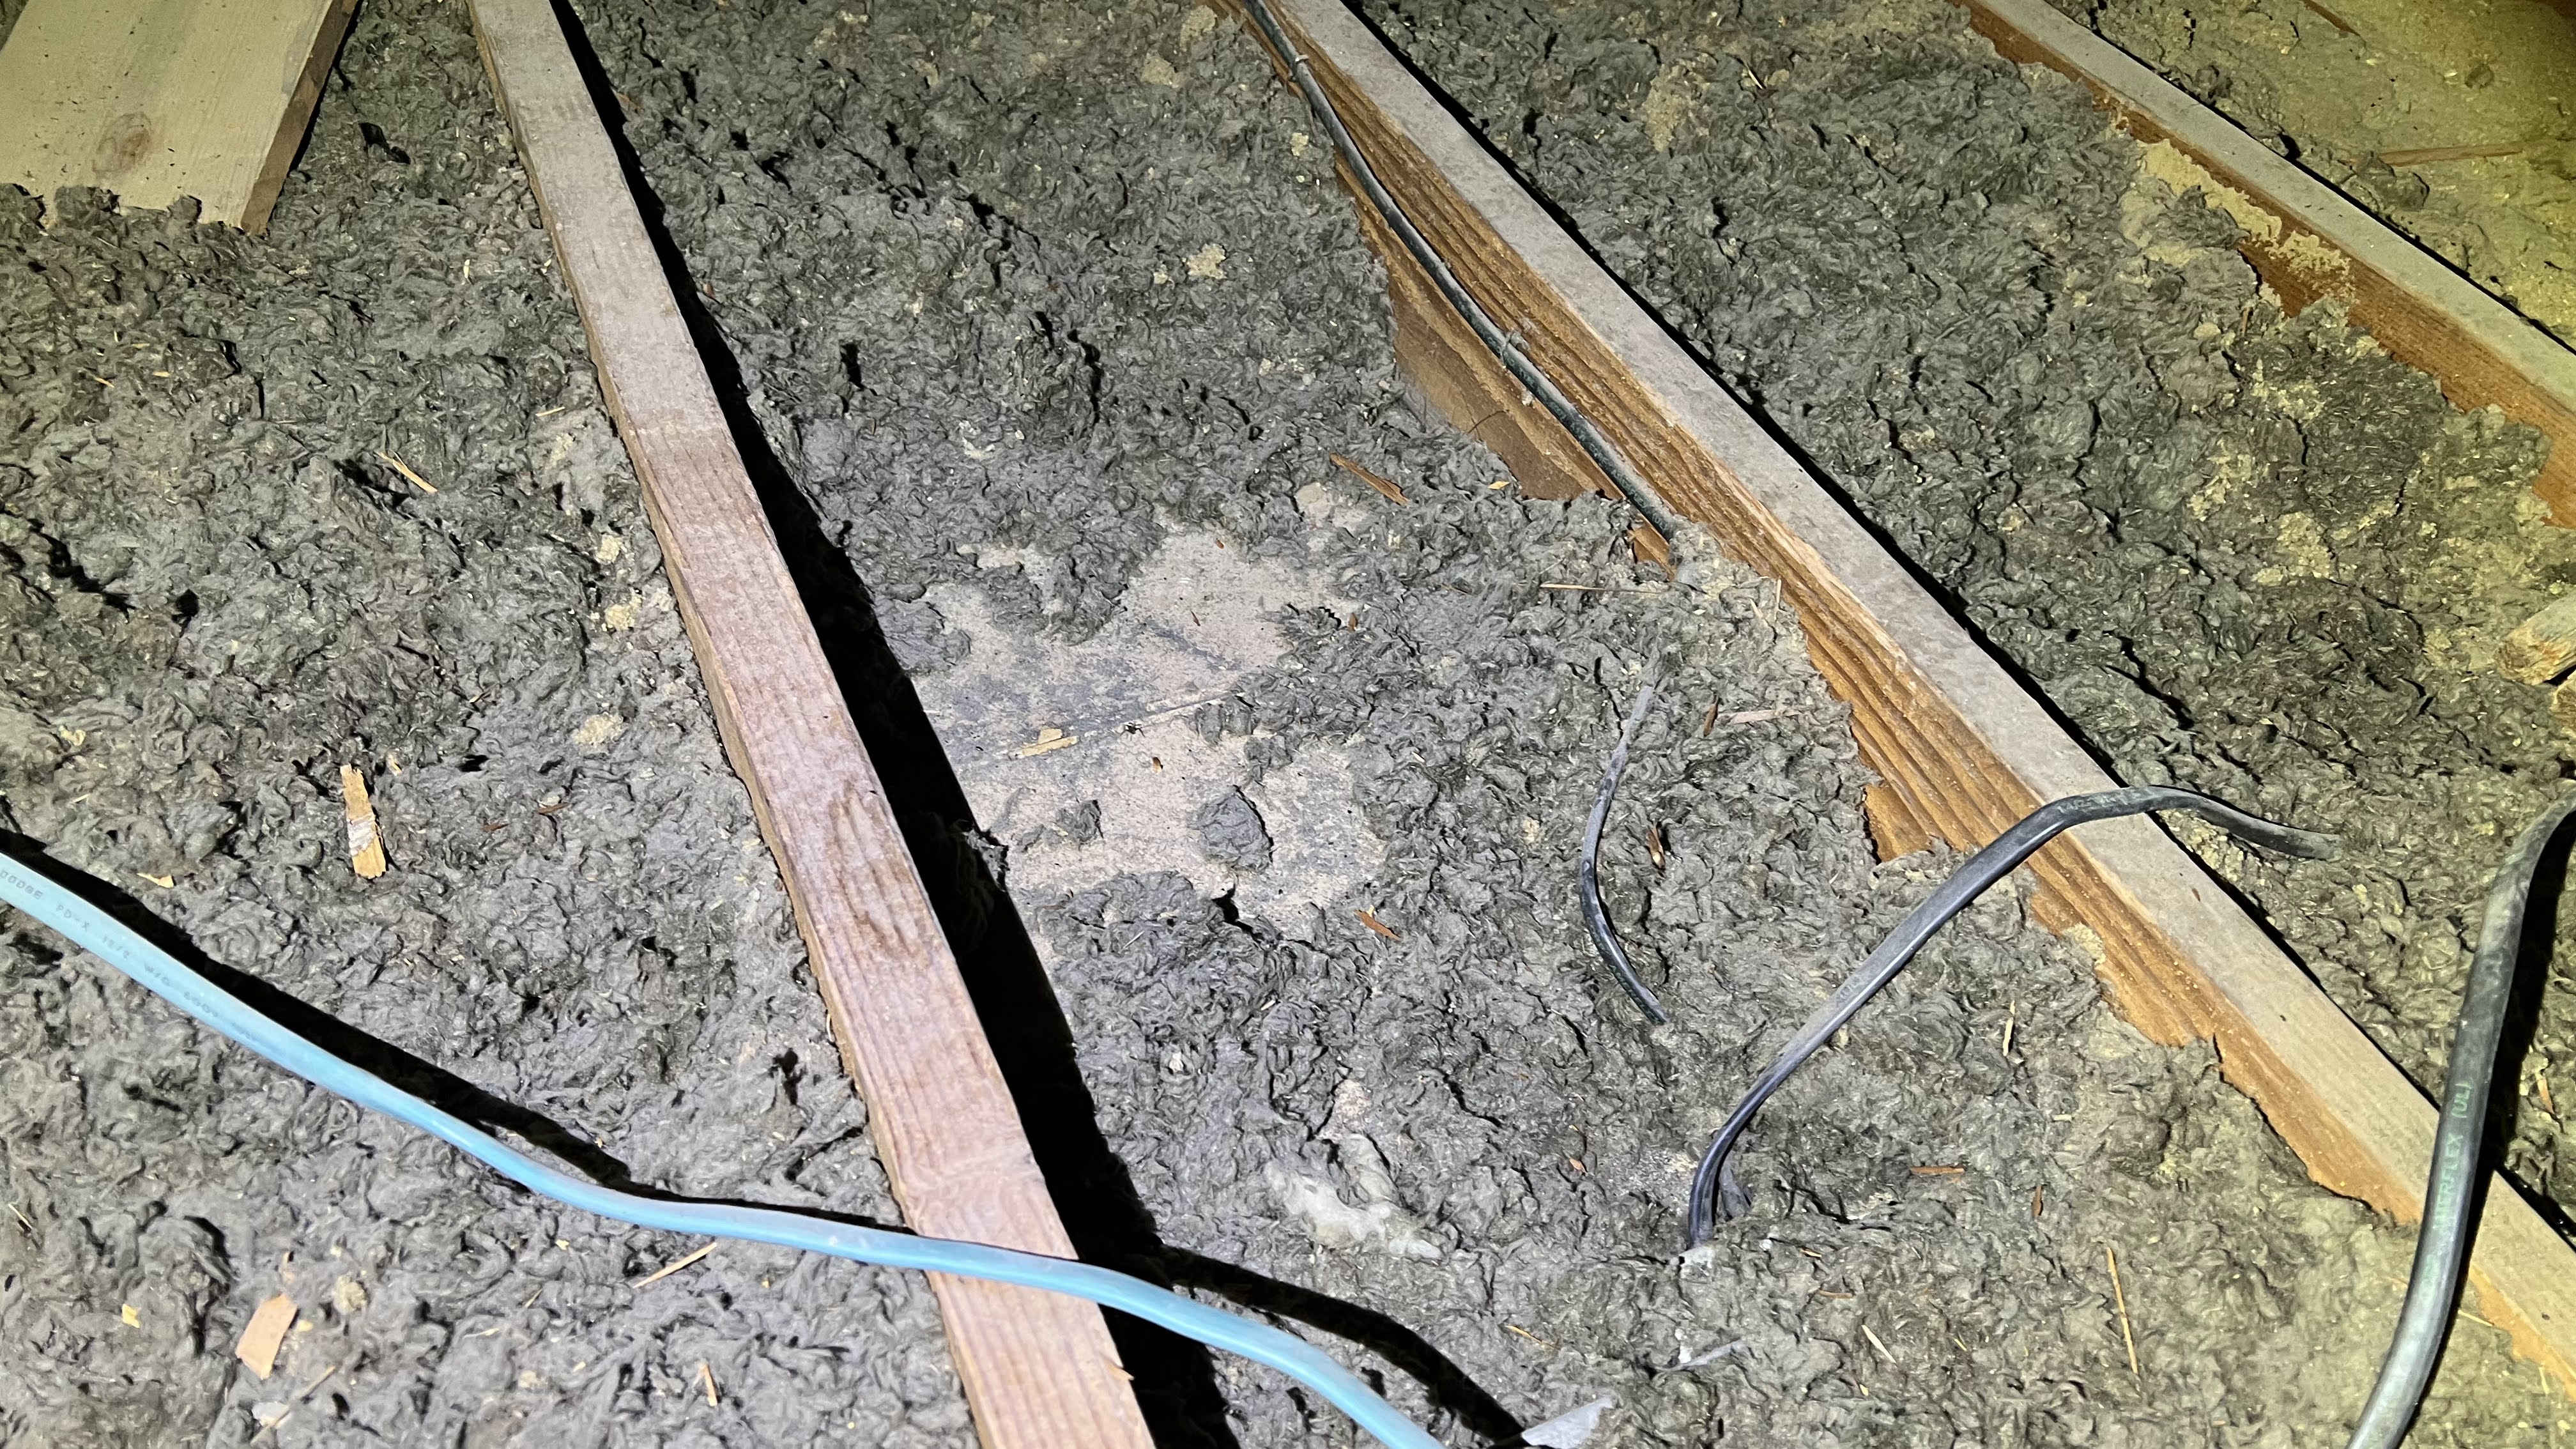
There are many types of insulation. The types and amount of insulation installed vary based on when and where the home was built. We commonly see fiberglass or rock wool insulation both as batts or blankets and loose fill. It’s possible to see vermiculite in older homes and increasingly common to see blown-in cellulose or fiberglass in newer homes.
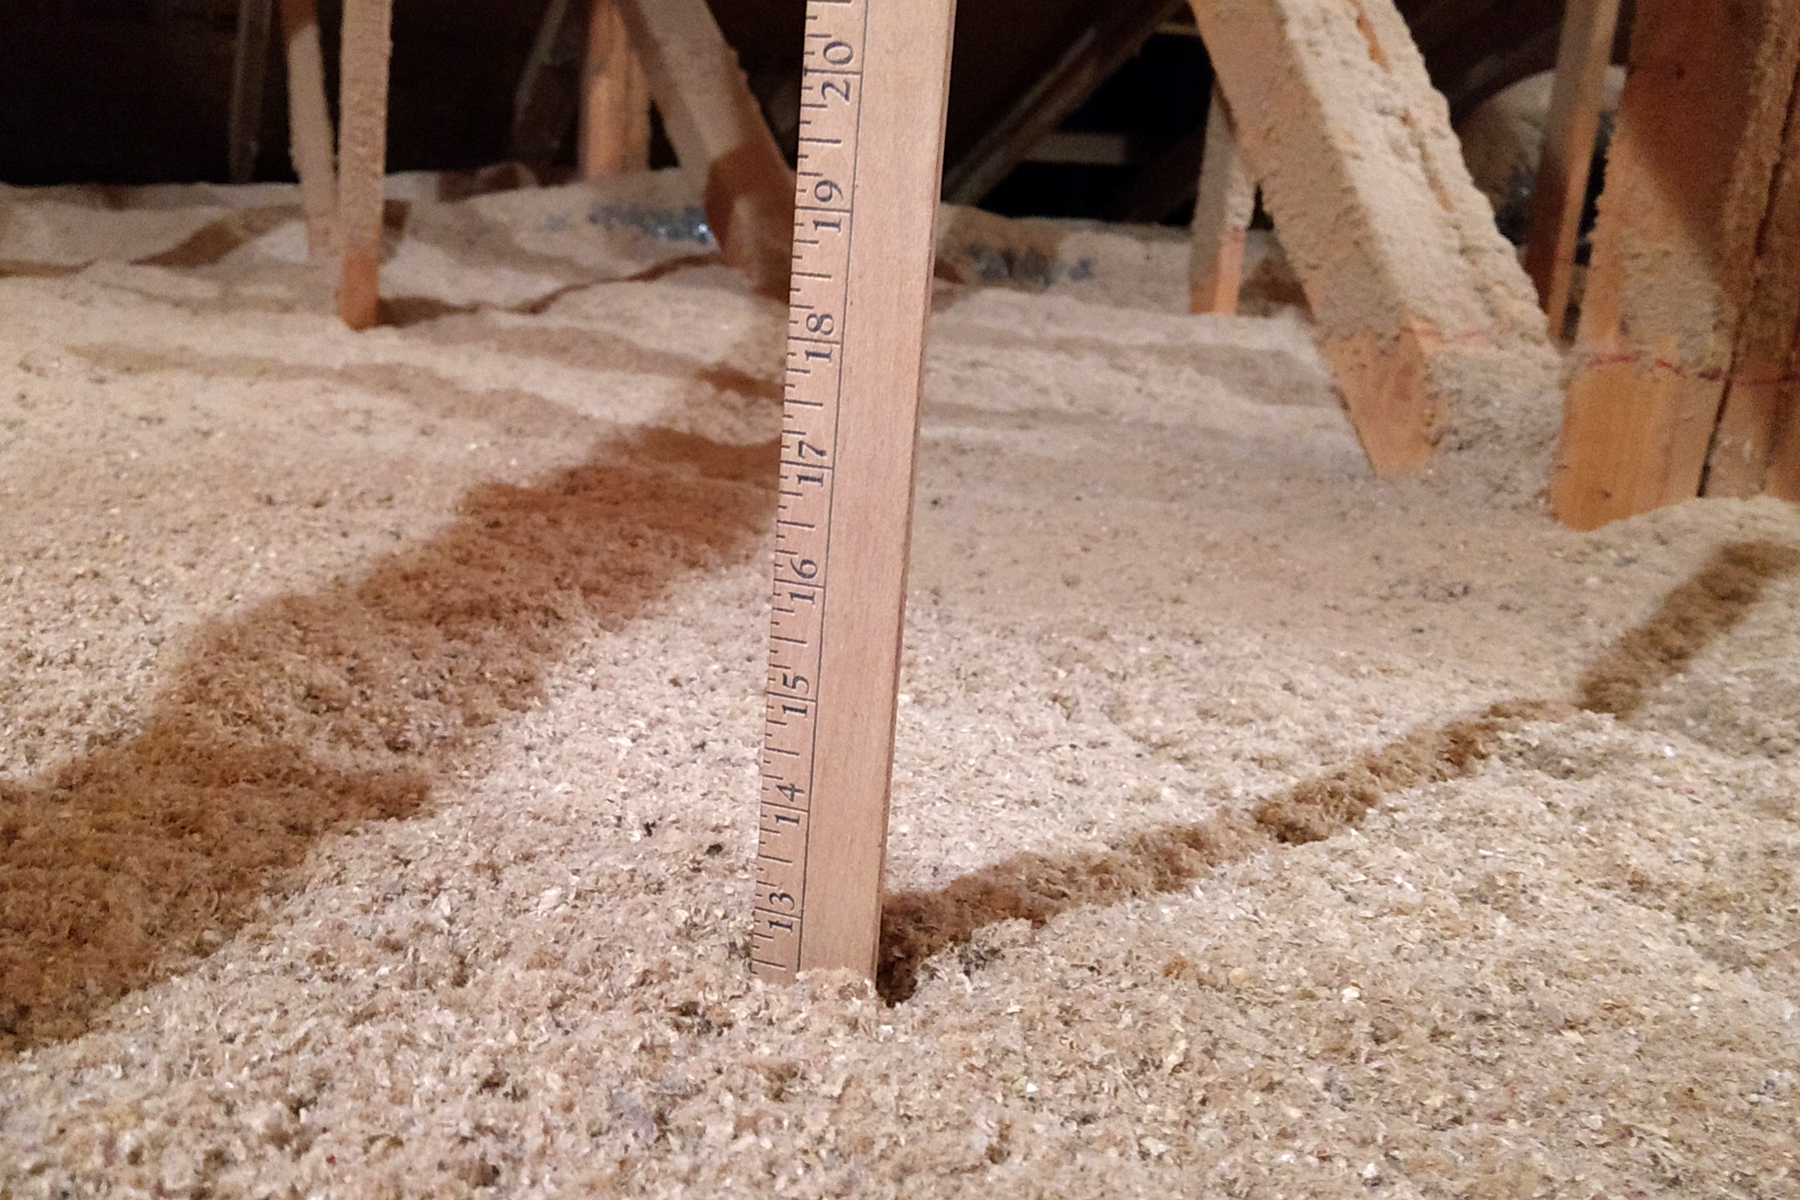
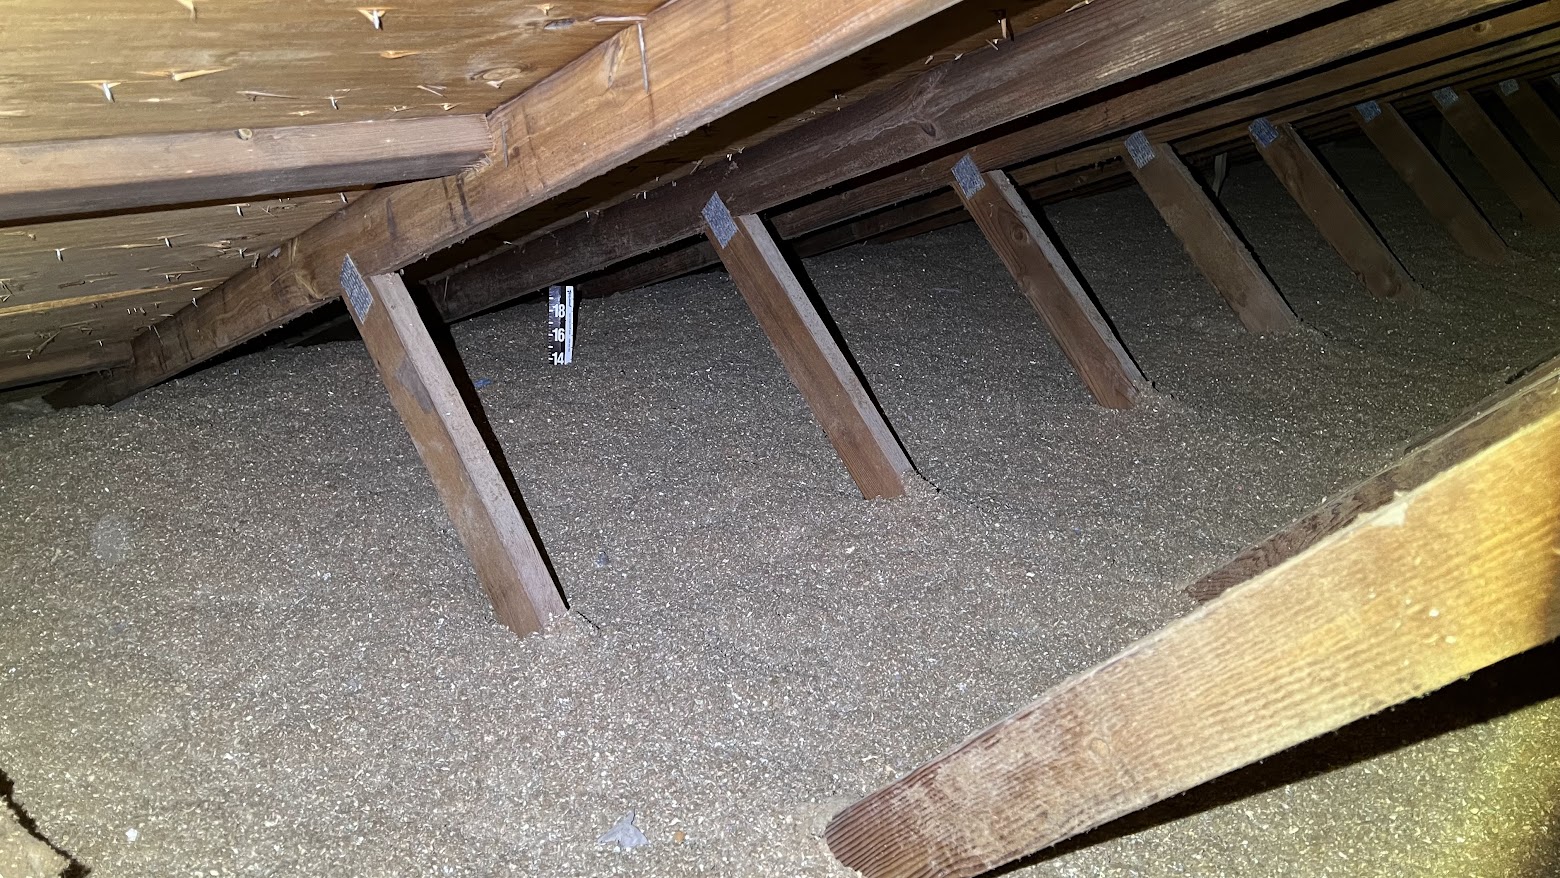
So the first step is to take a look at your attic to determine what type of insulation you have, measure how thick your insulation is, and multiply to calculate the current R-value of your attic insulation. The Energy Star program recommends at least R-38 for warmer southern climates up to R-60 for cooler northern climates of the United States. If the wooden joists in your attic are visible, you can look forward to significant savings by adding more insulation! So take a ruler or yardstick up in your attic, see what type of insulation you have and measure the thickness of your insulation. Then fill in the appropriate row on the chart below to calculate your current R-Value.
| Insulation Type | R-Value per Inch | Inches of Insulation | My total R-Value | ||
  Batts or Blankets of Fiberglass (Pink or yellow light weight fibers bonded together in a blanket) | 3.1 | X | = | ||
  Loose Fill Cellulose (Dense gray fibers of ground up newspaper) | 3.6 | X | = | ||
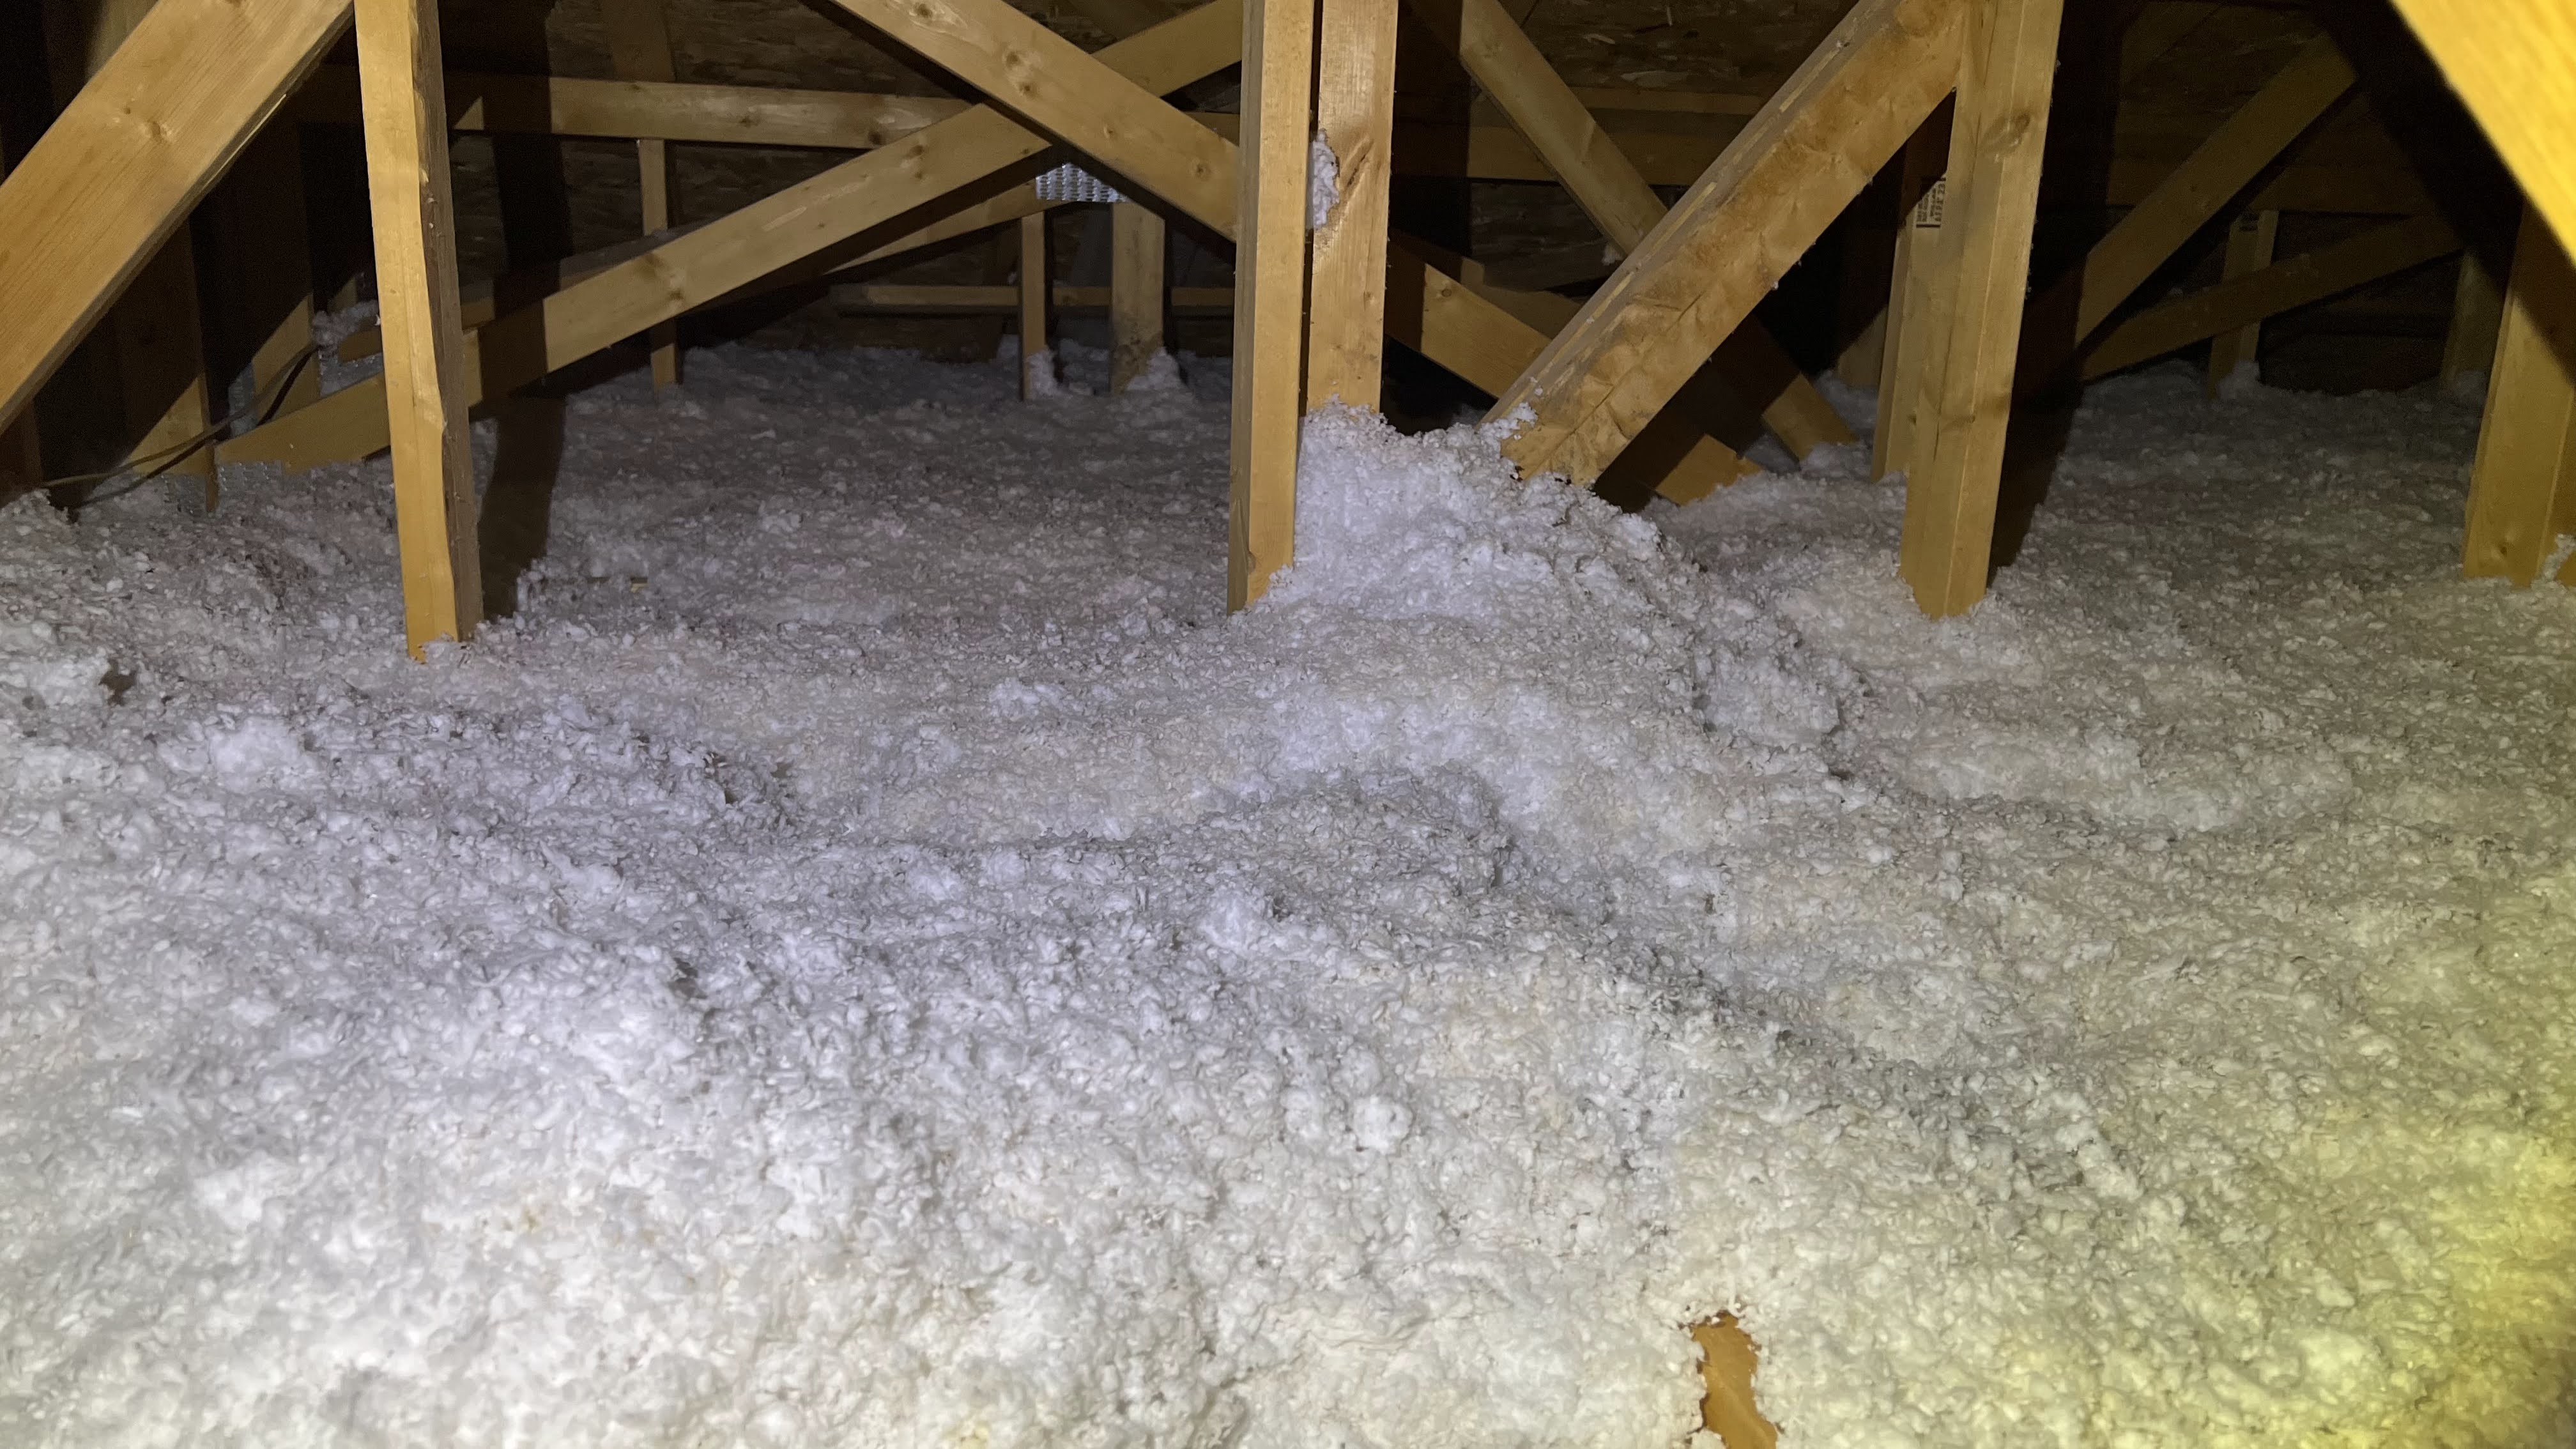  Loose Fill Fiberglass (white or pink lightweight fibers are common) | 2.2 | X | = | ||
  Loose Fill Rock Wool (yellow or gray dense fibers) | 2.9 | X | = | ||
 Loose Fill Vermiculite (Gray/Silver crystals) | 2.1 | X | = | ||
| Open Cell Spray Foam Insulation (sprayed as a liquid, expands in place- not difficult to stab or damage) | 3.5 | x | = | ||
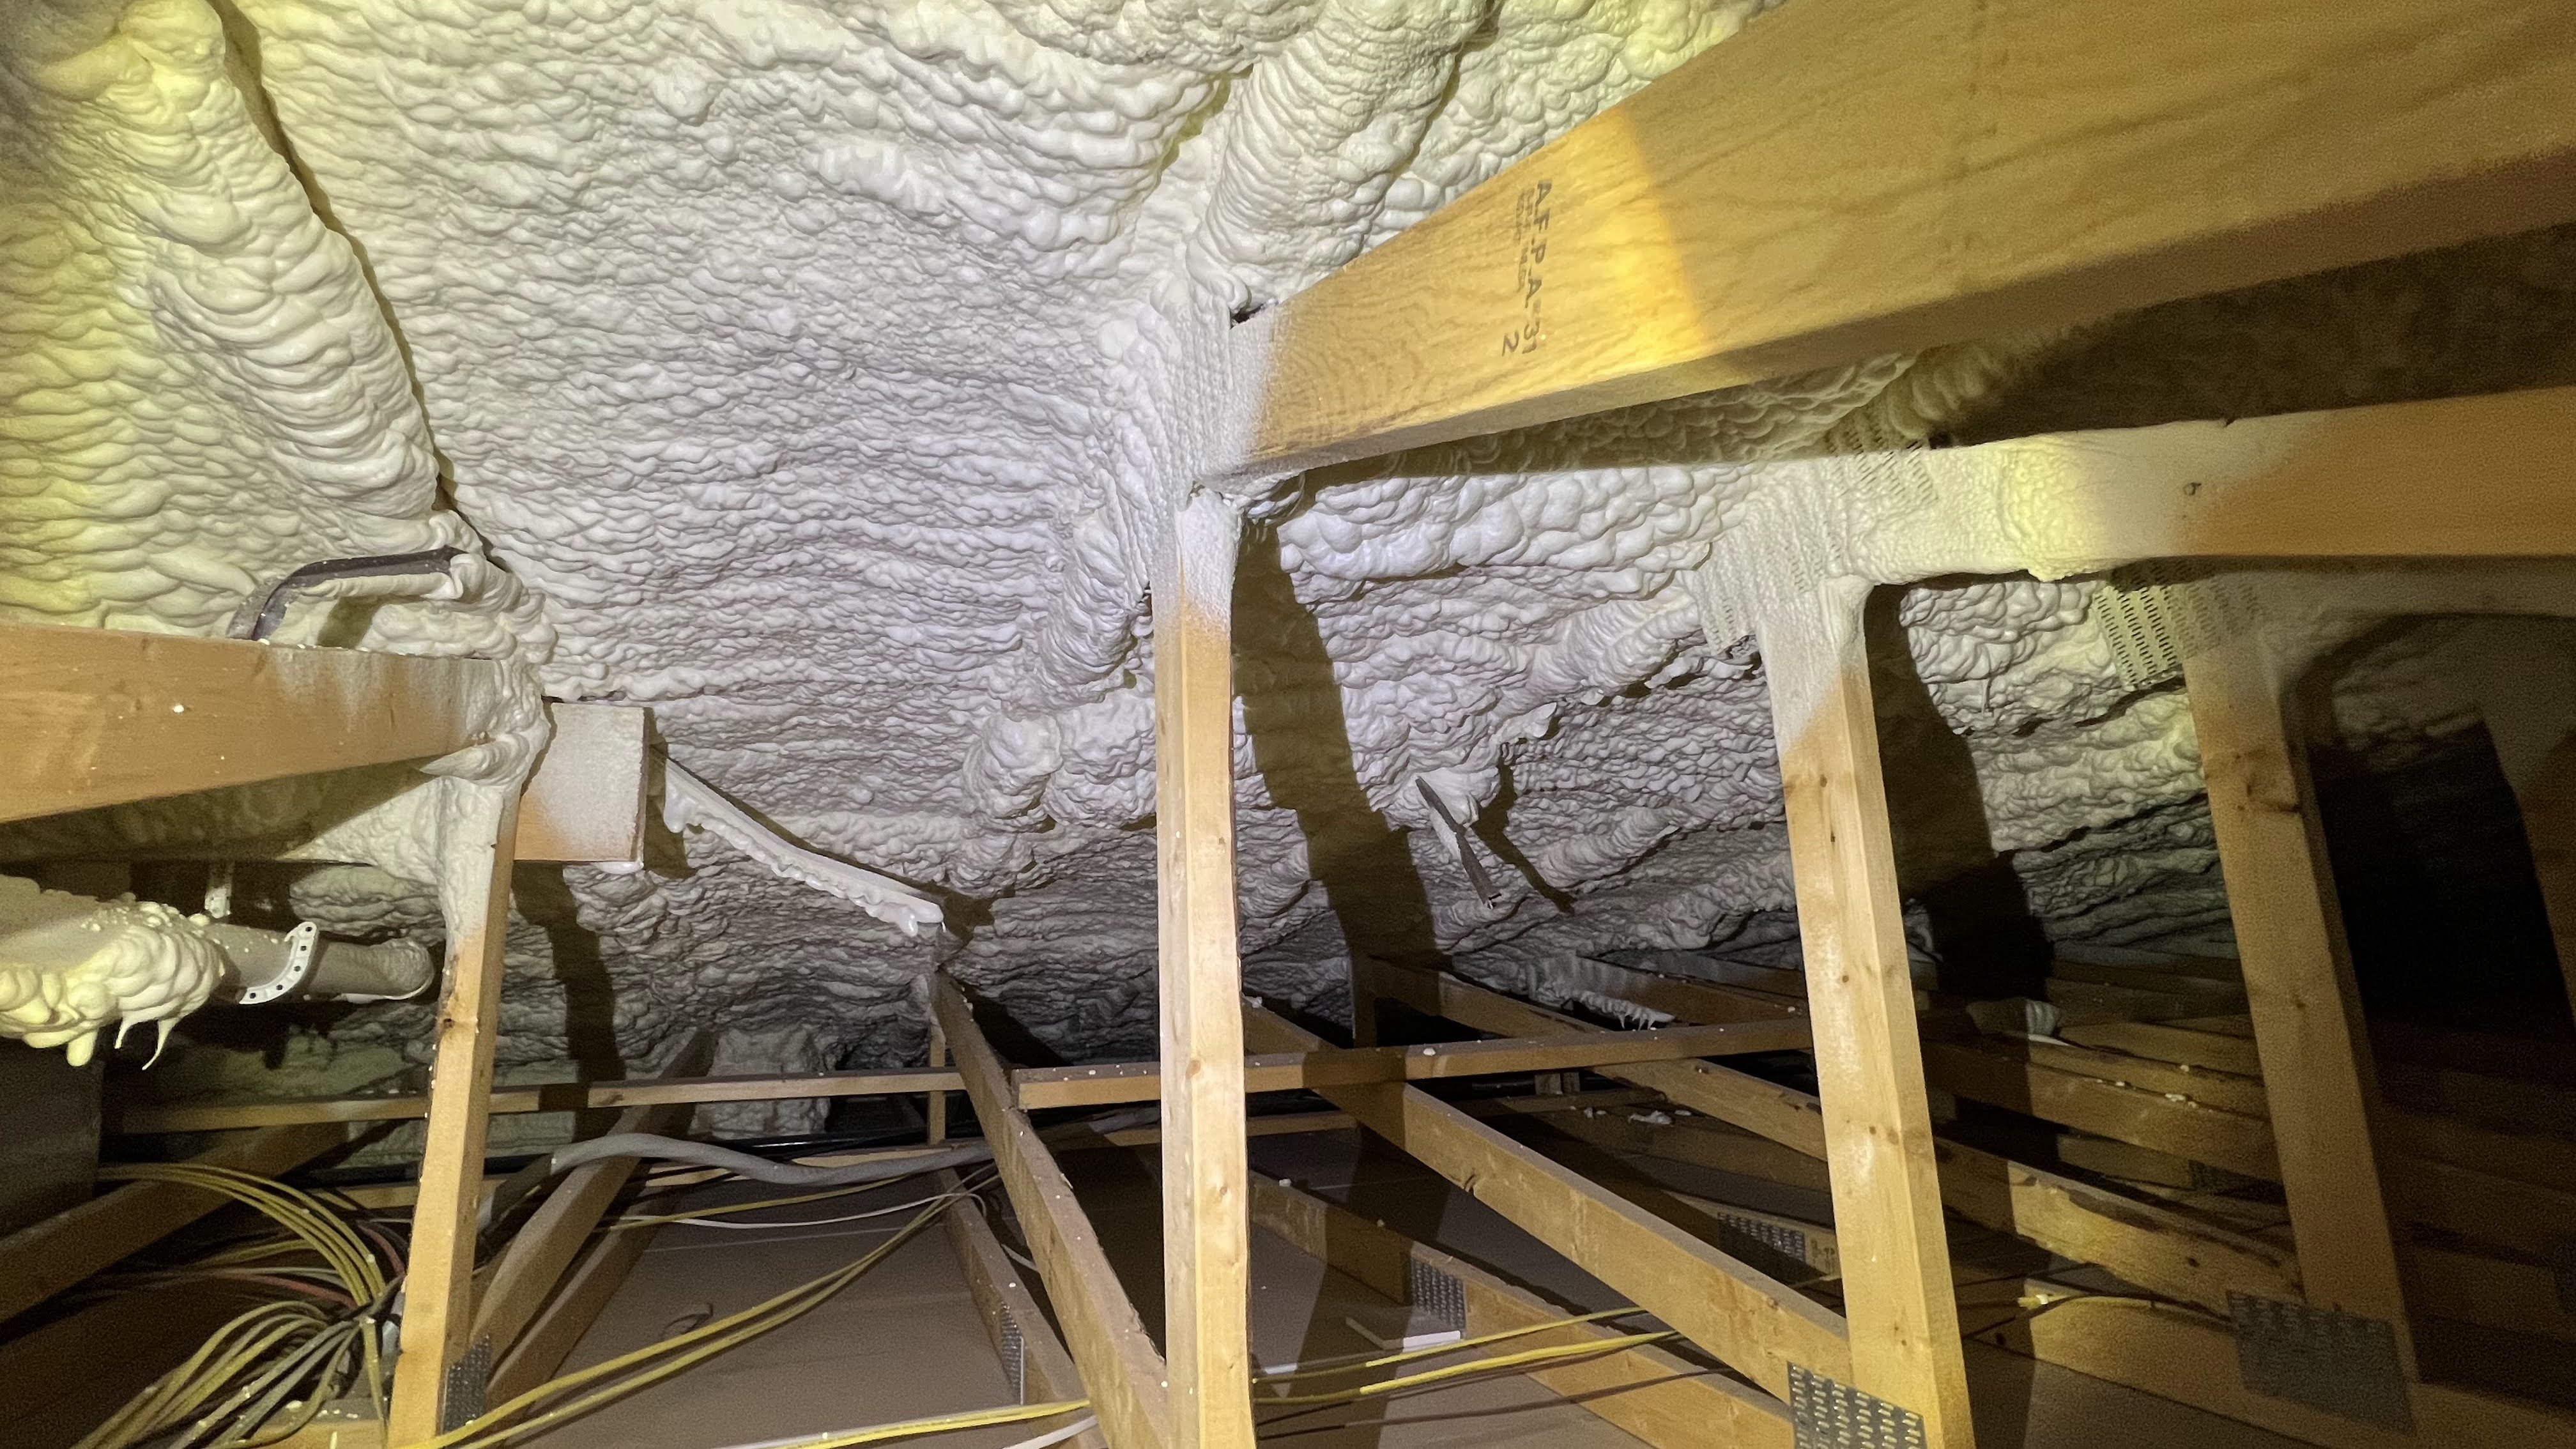 Closed Cell Spray Foam Insulation (also sprayed as a liquid, expands and hardens in place – much harder to damage) | 6.5 | x | = |
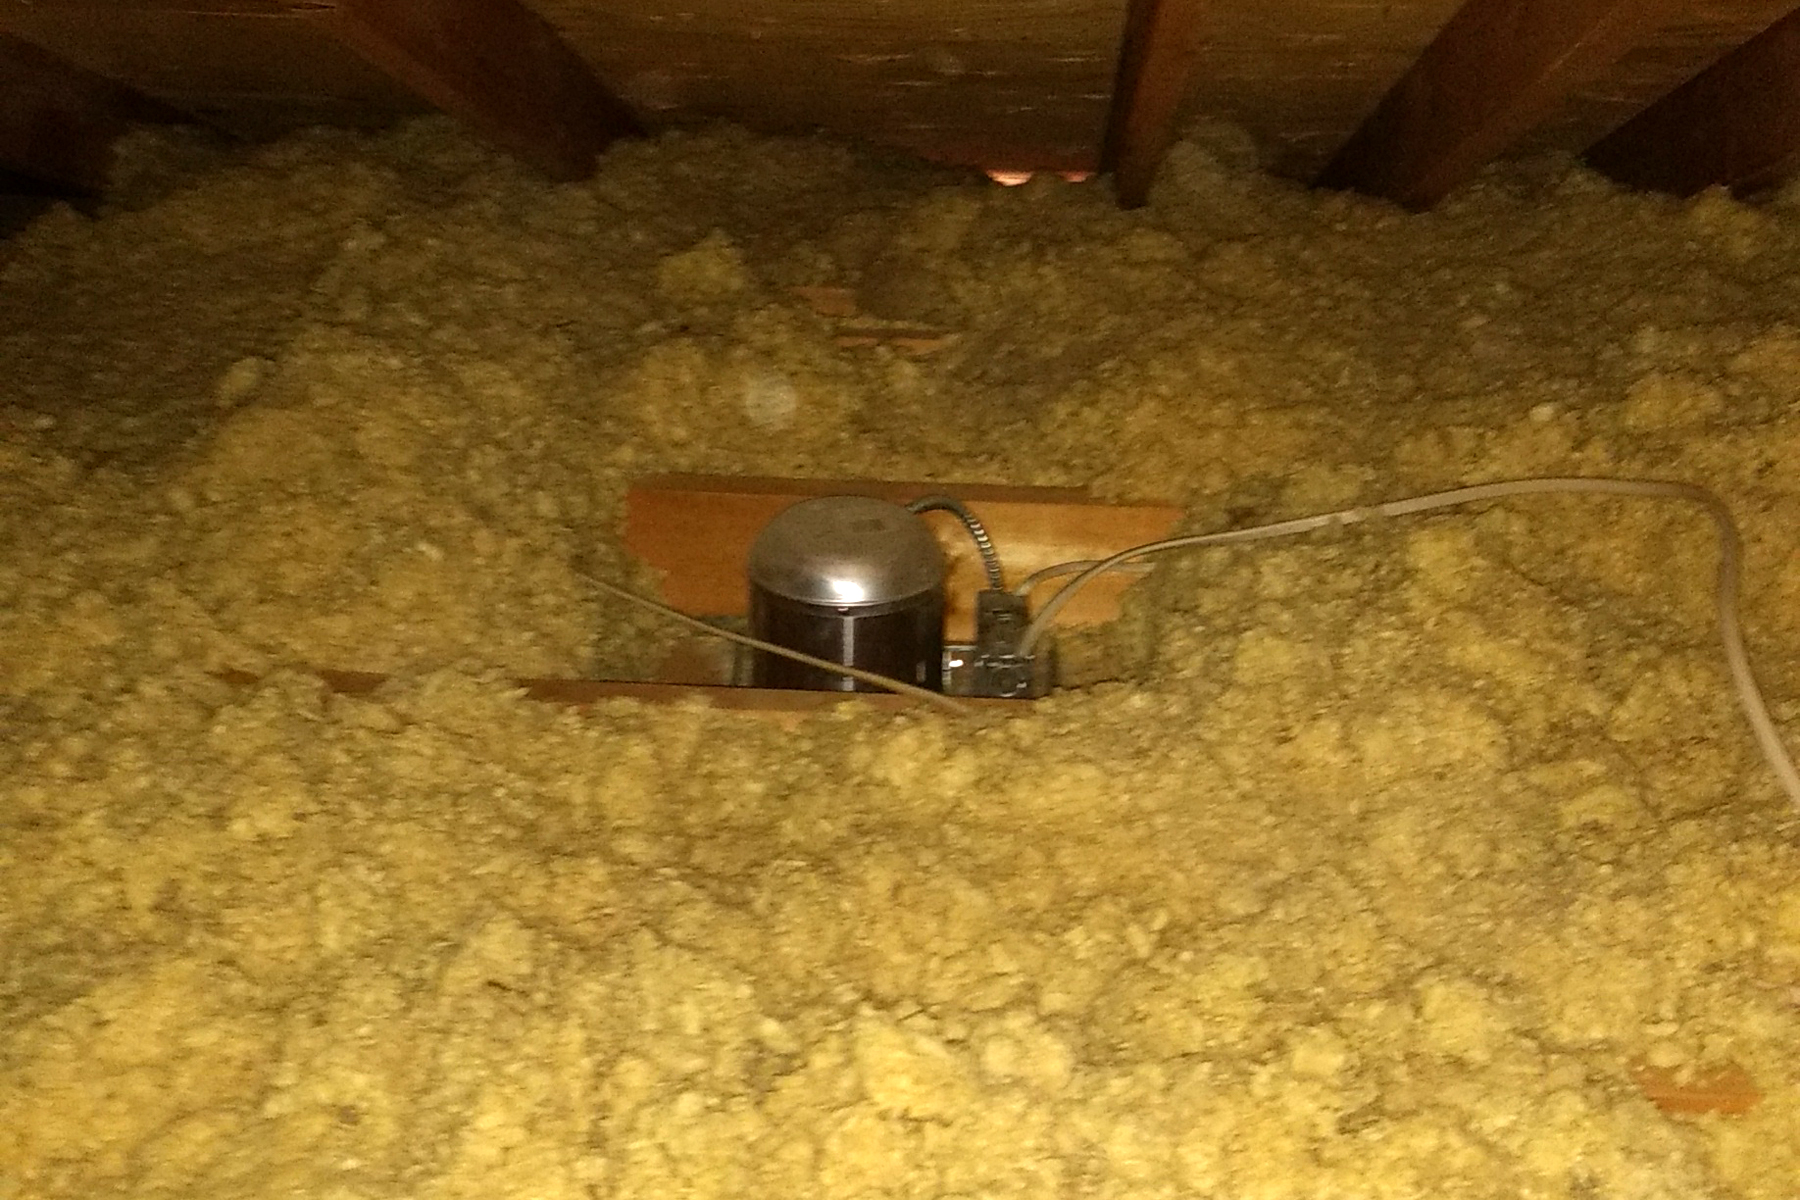
As part of your initial inspection, you’ll want to look for places where conditioned air might be leaking from the living space to your attic. These areas should be sealed before you add insulation. Some of the biggest problem areas include open areas around furnace flue pipes, dropped soffits that are open to the attic, and around recessed lights. Be aware that flue pipes and recessed lights can get VERY hot. Sheet metal flashing sealed with high-temperature caulk may be required to keep insulation from coming in contact with flue pipes. Insulation boxes can be purchased to protect recessed lights not rated for contact with insulation.
Other areas to investigate and seal include behind and under knee walls and around attic access points. For hatches or doors, attach 2-3 inches of rigid foam insulation to the attic side. Then add weatherstripping around the edges to create a good seal.
Make sure you do NOT fill in the gaps leading to your exterior eaves or soffits. These need to remain open to allow for airflow. You may even need to staple inexpensive vent chutes (shown below) to the bottom of the roof to prevent your additional insulation from blocking these gaps.

Finally the smaller areas to seal air leaks will require some expanding foam or caulking. Seal around plumbing pipes, bathroom or kitchen exhaust vents, electrical boxes, and wires coming up through walls. When combined, these small leaks can allow a lot of heated or cooled air out of your living space.
Time to Insulate
After calculating your current R-Values, you’ll need to decide how much and how best to add insulation if you need it. Fiberglass batts or rolls are easiest to handle and involve very little specialized equipment. A breathing mask, tape measure, and a utility knife will have you well on your way for small spaces. If you already have some insulation but the ceiling joists are still showing, run the bats perpendicular to the joists to better seal around breaks in the current insulation at each joist.
If you have a larger attic or need more insulation, you might consider blow in fiberglass or cellulose insulation. Many home improvement stores will offer free use of a blower with a minimum number of bags purchased. Before you start, it’s helpful to measure and mark your intended depths on the attic truss structures with a marker or cardboard insulation ruler. You’ll need a couple people; one to feed bags of insulation into the machine while the other persons controls the blower hose.
If these processes sound like too much for you, visit with your local home improvement stores to discuss costs and benefits of various insulation solutions in your area. They may also be able to help you connect with insulation contractors to get estimates for your project.
Cost Savings
Predicting the amount of money you can save by adding insulation can be difficult. Variables such as the current cost to heat and cool your home, the effectiveness of your current attic insulation, the percent of loss through walls/doors/windows, variations in weather, personal temperature preferences, and other wildcards can affect your savings. It stands to reason though, if you seal leaks and fix insulation deficiencies, you can expect savings. And the longer you plan to stay in your home, the greater the savings you can expect!
If you have questions about upgrading your insulation, feel free to contact me and please share your stories and savings if you decide to upgrade your insulation!


Leave a comment